A few weeks ago I posted the triangle baby quilt I made for our little mister. I'm back today to share some details on how I made it.
I made my quilt with help from blog posts here and here and this video about hand stitching the binding.
I ordered my fabrics from fabric.com. They are Kona Cotton in colors grass green, white, medium gray, teal blue, aqua, caribbean, nightfall and green tea. I got half a yard of each color except for the back fabric where I got an extra 2 yards and the binding which I had on hand already.
I used this white thread for my basic sewing and this lime green thread for my accent color. This hand quilting thread was used for the binding.
I spent a whole day cutting out all the triangles. They measure 6 inches. Then I stacked them up by color and began laying them out into a pattern. Some people just sew them together as they go not really paying attention to the layout, but I wanted mine pre-layed out so I would know what the outcome would be.
Ariana helped me find the right pattern. There are 17 triangles in each row and there are 11 rows. I stacked each row up and labeled them to keep track of how I want my layout to be.
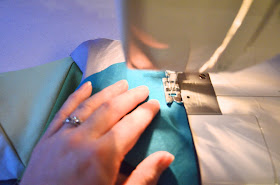
Then I began sewing the triangles together. I started with sewing the triangles in each row first, then sewed the rows together (row 1 and 2 together, row 3 and 4 together) to make sets.
This was the fun part because you could start to see it coming together and lining up nicely. Not all the triangles lined up perfectly but they were close enough.
And then before I knew it, I had a quilt top. This is when I really kicked it into high gear. Seeing the quilt top come together really made me fall in love with it even more and I couldn't wait to see the whole thing finished!
Then I had to sandwich the top layer, the batting and the back together and sew it all together.
I went along each side of each triangle because I figured that since it was a baby quilt it would have a lot of wear and tear and washing and this would help it hold up. Then I hand stitched on the binding and it was done. You can see the rest of the finished quilt in my post here.


No comments:
Post a Comment